Installing AnyConnect VPN Client - OSX
This tutorial is a walk through on connecting to the campus VPN system with the CISCO AnyConnect client OSX (10.7+). This system went into effect Sept. 2012 with the previous CISCO and Nortel systems and clients becoming obsolete later the same semester.
OSX has a CISCO IPSEC client built into it’s network options, but that is not compatible with the AnyConnect system. Older systems, 10.4 and lower, may actually had an app installed to Applications | CISCO. If you have this folder please trash it before proceeding.
1. Open a web browser and proceed to https://anyconnect.missouri.edu.
2. We recommend getting in the habit of selecting the *Employee from the dropdown and click the Login button.
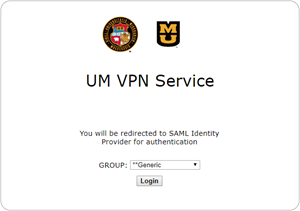
fig 1
Currently, only faculty/staff and GRA’s can use the *Employee profile. Undergrad Students must use the *Generic which limits them to basic services that do not include DCRC, VetMed or any other TigerNet2 resources. However, in this web interface, some faculty/staff have had to use *Generic option to get login to succeed to access the client install download.
3. You will be redirected to MU Microsoft Authentication page where you must enter you ID in the format of sso@umsystem.edu and MU Password. Enter the digit corresponding with the method to receive your response code, or the code if you already have it at hand.
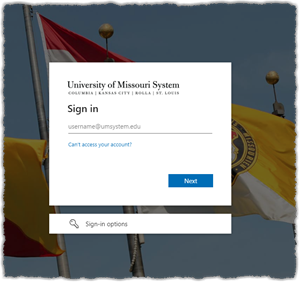
fig 2
Once logged in, you will have ~60seconds to complete the download process before your session will be kicked!!
4. If you have not used MFA on this browser, checked the Don’t ask again for 30 days, cleared your browser’s cache and/or its been longer than 30days, you will be prompted for your 2Factor code.
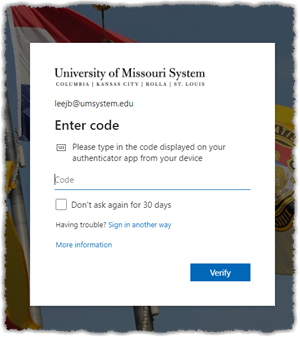
fig 3
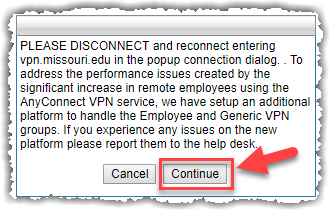
5. You may receive a prompt asking you to disconnect, you must IGNORE this and click the Continue button.
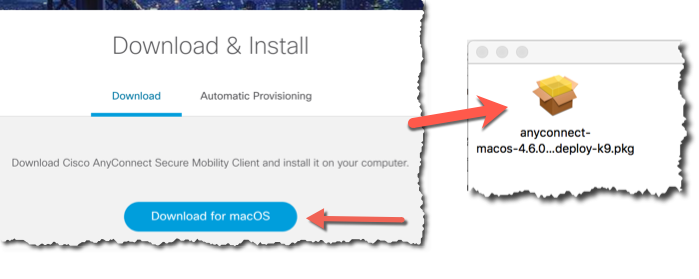
6. You will be presented with a download link. Click the download button and save the .dmg file. It will extract and you can double-click the .pkg file that appears to start the install.
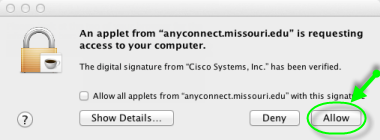
7. You will be presented with a Wizard. You may see multiple confirmation popups asking you to allow an applet, do…
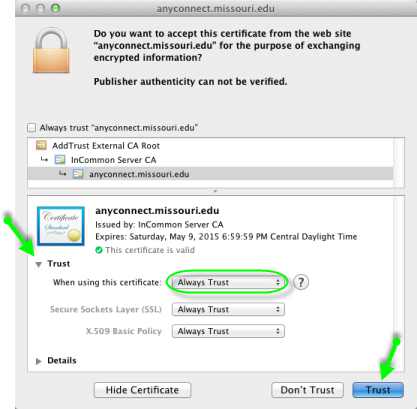
... and to trust a certificate, do as well, but its best to expand the Trust section, set the first dropdown to Always Trust and then click Trust.
8. Click the AnyConnect icon in the lower right and the connect dialog will appear. If the field is blank or has the old address, enter vpn.missouri.edu, then click Connect.
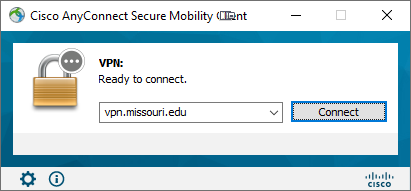
As of March 30th 2020, all Faculty/Staff using the *Employee vpn group MUST use the VPN.MISSOURI.EDU server address when connecting. This is different than the url to download and install the client.
9. Two popups will occur… one allowing you to select which VPN group, this must be set to *Employee BEFORE you login.
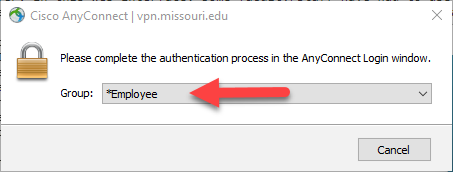
The second will be, as in step three above, a prompt for your @umsystem.edu formatted ID, password and possibly your 2Factor code.
The group selection popup often is hidden behind the Login popup. You may have to move or minimize the login screen to see the group selection and again MUST set the proper group BEFORE you complete the login process. Once you set, the next time you connect it should remember the previous selection.
If there is an update to the client, it may install here. Wait till completed.
10. If successful, you should see the AnyConnect icon with a yellow padlock on the menu bar in the upper right.

If you do not see the icon on the menu bar or have quit the AnyConnect client and wish to start it, simply go to Applications | CISCO and click the AnyConnect app.


